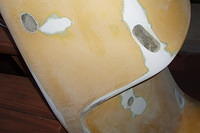
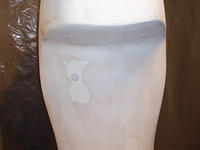
- Backlit tail section, so you can see the repair areas.
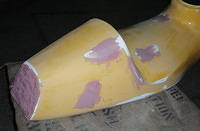
- I used 2-3 layers of fiberglass mat and cloth from underneath, and a polyester resin.
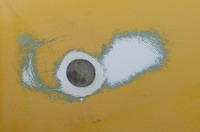
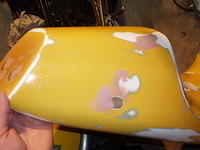
- Even though these were only small areas of delamination where the seat had started to wear through the fiberglass from rubbing against the frame, I enlarged them with a dremel. They look like fish eyes!
- I also used small patches of mat cut to the size of the holes and glassed them in from the outside.

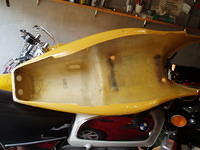
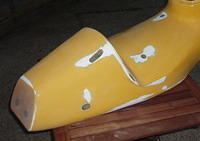
- The seat and the flat rear take the most abuse while not crashing. I put a large piece of cloth underneat the seat, and the flat rear section has several layers of cloth and mat.
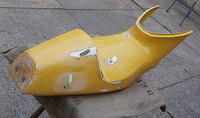
- You can see where the tail was fastened to the subframe at the back. I re-glassed this with lots of layers as it showed some delamination from a year of track use. The new aluminum subframe will require new holes in the tail section anyway.
- After some 40 grit power sanding, I used some body putty to even things out. The stuff "kicked" in about 2 minutes, so that I didn't have time to get the rear smoothed out before it turned into the consistancy of day-old doggie doo. Luckily this stu...
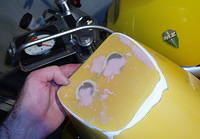
- After sanding for about 6 days. I'm seriously afraid I didn't remove enough paint before I covered this with glass. A couple of Dzuses will hold the tail onto the subframe here, so it has to be strong... We shall see.
- Almost ready for Duplicolor! If Ben Beasley was in a grave, he'd be turning in it. It looks OK, we'll have to see if chasing Morgi on his fancy new SV around Loudon makes it break up into little bits...
- After 1st coat primer. The whole job turned out pretty well, except that a moth flew into my final coat just as I was finishing up. Oh well, it's a track bike!